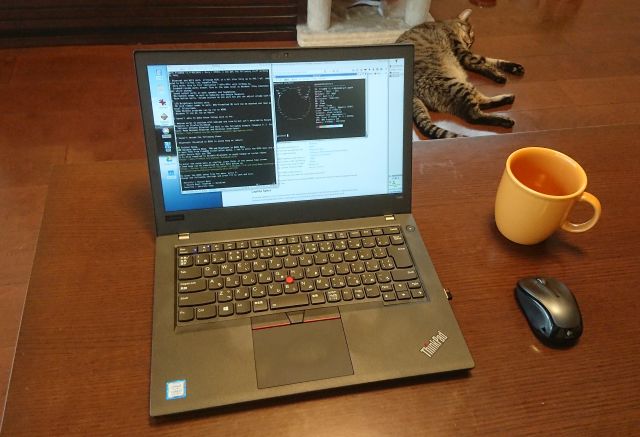
ThinkPad T480 is my new main laptop which runs FreeBSD
I’ve been using FreeBSD as my primary server OS for quite a long time.
But, for unknown reasons, I have never seriously used it on client workstations.
Maybe it’s partly because I’m a CUI-oriented person who loves doing things on text terminals as much as possible.
Actually, I have been pretty happy with any client OS as long as I could use a decent terminal on it, so that I could SSH into FreeBSD servers where I spent a lot of time doing jobs which didn’t require graphical interface.
However, it’s also true that I have been wishing for a FreeBSD desktop which allows me to do everything from web browsing to text editing on a single machine.
So I started a research on FreeBSD laptops in the midst of this year’s longer-than-usual rainy season. After gathering information on the web, I tried various GUI setup on VMs and then I bought a new laptop, Lenovo ThinkPad T480.
Experimenting for a while on the T480, finally I’ve got a fully working FreeBSD laptop for daily use, just after the rainy season was over!
Because it has proven to be a really great machine for running FreeBSD, I write this article to share something with anyone who looks for a similar experience.
Laptop Specs
Generally speaking, I love small machines with low power consumption. But this time, my goal is replacing my main desktop (running Windows) with a new laptop, so I invested on performance much more than usual.
- CPU: Core i7-8550U 1.8GHz (Boosted to 4.0GHz) (4 cores/8 threads, TDP 15W)
- RAM: 32GB (16GBx2) DDR4 2400MHz SODIMM
- Storage: SAMSUNG 860 EVO 1.0TB SATA SSD
(originally the laptop came with a SEAGATE STL1000LM035 1.0TB (5400rpm) SATA) - VGA: Integrated Intel UHD Graphics 620
- Ethernet: Intel Ethernet Connection I219-V (Onboard 1000BASE-T)
- WiFi: Intel Dual Band Wireless-AC 8265 (2x2 AC) + BT 4.1
- No Fingerprint and Smartcard readers
What works and what does not
With FreeBSD 12.0-RELEASE + Xorg + XFCE4, I can get the following stuff working on T480.
- Ethernet and WiFi work, although WiFi is a bit slow (only up to 802.11a?) compared to 802.11n/802.11ac capable OSes.
- Xorg works fine in full resolution (1920x1080) with i915kms.ko.
- Suspend/resume works almost fine as the same level as Windows (they sometimes get weird anyway).
- Sound output works on both speaker and headphones.
- Microphone seems to work on Audacity and Google Hangouts.
- Mute button works. Volume buttons do not work but you can adjust volume with UI.
- LCD Brightness buttons work.
- SD card reader seems to work. DOS-formatted SD card can be mounted and read as usual filesystems.
- Some Windows programs can be run on WINE.
- Windows 10 can be run on bhyve (to purchase MP3s on Amazon Music, etc).
- LAGG Failover between Ethernet and WiFi works (Use Ethernet if it’s available. Otherwise use WiFi).
- Webcam works on Chromium, Firefox and pwcview with webcamd and cuse.ko. It can be used for video conferencing on Jitsi Meet and a private jitsi-meet (port is available) instance.
I haven’t tested the following items.
- Bluetooth (disabled in BIOS to avoid hang on reboot)
Initial Setup
Disable Secure Boot, TPM and Bluetooth
To boot T480 from FreeBSD installation media, I had to enter the BIOS menu and disable Secure Boot and TPM.
It is also required to disable Bluetooth to avoid hangup on system reboot.
https://wiki.freebsd.org/Laptops/Thinkpad_X270
To enter the setup menu on startup, press Enter at the Lenovo logo screen.
A loud beep can be suppressed by turn Mute button on.
https://forums.lenovo.com/t5/ThinkPad-11e-Windows-13-E-and/Loud-Beep-entering-bios-selecting-bootdevice-annoyance/td-p/2041295
To enter the BIOS setup from the menu, press F1.
Change the following settings and press F10 to save and exit.
- Security > Secure Boot
- Secure Boot: Enabled -> Disabled
- Security > Security Chip
- Security Chip: Enabled -> Disabled
- Security > I/O Port Access
- Bluetooth: Enabled -> Disabled
It looks like the memstick installer supports UEFI boot so I left “Startup” page’s “UEFI/Legacy Boot” and “CSM Support” untouched (“UEFI Only” and “NO” respectively).
Which Version to Install?
At first, I selected the following FreeBSD versions as candidates.
- FreeBSD 12.0-RELEASE
- FreeBSD 12-STABLE
- FreeBSD 11.3-RELEASE
With experts' advices on Twitter and experiments on actual machine with installation media and RAM disk (Maybe on another post), I chose 12.0-RELEASE to start with. Now it turns out to be the right choice based on the right advices.
OS Installation
There’s almost nothing special about installation. But here’s a few things to note.
-
To boot from a USB stick (memstick.img), press Enter > F12 to enter the Boot Menu and select the USB HDD to boot.
-
For distribution sets, I selected ‘kernel-dbg’ and ‘lib32’ in addition to implicit ‘base’ and ‘kernel’ (lib32 for WINE).
-
For filesystem, of course I chose ZFS. Specify “GPT (UEFI)” for partitioning scheme. I created a 4g swap partition mostly for crash dump space.
-
I setup WiFi interface iwm0.
-
For system services, I enable moused, ntpd, powerd and disable sshd.
-
I put my user account in secondary groups wheel, operator and video.
-
Before exiting the installer, I manually renamed a ZFS dataset for home directories as usual.
rm /home
zfs rename zroot/usr/home zroot/home
zfs set mountpoint=/home zroot/home
exit
Basic Configurations After the First Boot
After the first boot, I logged in and performed the following usual configurations.
-
Update the OS.
su freebsd-update fetch install shutdown -r now -
Install basic packages. I usually install non-X or lite versions if available but this time I selected full versions.
su pkg update pkg install git vim tmux bash sudo rsync perl5 ja-nkf zfs-stats portmaster gnupg1 -
Configure sudoers.
visudo -
Configure user preferences such as dotfiles.
Setting up Grahpical Desktop Environment
I’m completely new to the graphical desktop world. So it’s inevitable for me to learn things one by one through a lot of trial and error.
Anyway, I use the following components to build my desktop.
- Xorg - Display Server
- SLiM - Login Manager
- Xfce - Desktop Environment
Plus, here is the list of graphical applications for my daily use.
- Xfce4-Terminal - Terminal Emulator
- Firefox, Chromium - Web Browser
- Thunderbird - Email Client
- Joplin - Note Taking Application (Evernote Alternative)
- Rhythmbox - Jukebox
- VLC media player - Media Player
- GIMP - Image Editor
- Inkscape - Drawing Tool
- Audacity - Audio Editor
- HandBrake - Video Transcoder
- Picasa3 (Windows Application) - Picture Organizer which runs on WINE.
Setup process was as follows.
-
Install Graphics Driver and reboot the system.
sudo pkg install drm-kmod sudo sysrc kld_list="/boot/modules/i915kms.ko" shutdown -r now -
Install Xorg and releated packages.
sudo pkg install xorg xfce xfce4-goodies slim slim-themes -
Install local language stuff
sudo pkg install japanese/font-std japanese/font-vlgothic japanese/font-takao ja-fcitx-mozc ja-fcitx-skk zh-fcitx-configtool -
Create ~/.xinitrc.
There are a lot of language configurations. Please ignore them if you do not need them.#!/bin/sh # # ~/.xinitrc for Xfce4 # ## Locale export LC_ALL=ja_JP.UTF-8 export LANGUAGE=ja_JP.UTF-8 export LANG=ja_JP.UTF-8 ## Input Method - fcitx-mozc export GTK_IM_MODULE=fcitx export QT_IM_MODULE=fcitx export XMODIFIERS='@im=fcitx' ## Start Input Method /usr/local/bin/mozc start fcitx -r -d ## Disable Beep xset -b ## Start Xfce4 exec startxfce4 -
Configure and start services. This brings up a graphical login manager.
sudo sysrc dbus_enable=YES sudo sysrc hald_enable=YES sudo sysrc polkitd_enable=YES sudo sysrc avahi_daemon_enable=YES sudo sysrc avahi_dnsconfd_enable=YES sudo sysrc slim_enable=YES sudo service dbus start sudo service hald start sudo service avahi-daemon start sudo service avahi-dnsconfd start sudo service slim start -
Install applications.
sudo pkg install firefox thunderbird chromium ...
Personal Notes on Further Setup
Touchpad and TrackPoint
https://ben-rowan.github.io/post/disable_lenovo_trackpad/
- As I use a wireless mouse (Logicool’s Unifying one) most of the time, I disabled touchpad and enabled “Virtual Scrolling” with the TrackPoint and the middle button instead.
[/boot/loader.conf]
[/etc/sysctl.conf]hw.psm.synaptics_support="1"
[/etc/rc.conf]hw.psm.synaptics.min_pressure=220moused_flags="-V"
Suspend/Resume
I was able to perform suspend/resume by running acpiconf -s 3 or from the XFCE4’s “Logout” dialog almost out of the box.
But at some point, I realized the following behaviors of the Logout dialog.
-
When I login for the first time after the system boots, the dialog shows all of “Logout”, “Reboot”, “Shutdown”, “Suspend” and “Hibernate” and all work fine.
(I thought the last one was not supported by the OS and didn’t tried it) -
When the suspended system resumes or I login to the system after logging out, the dialog only shows “Logout” in active state and other options are grayed out or not displayed at all.
After some struggle, those were solved by creating the following polkit rule file (e.g. 85-suspend.rules) in /usr/local/etc/polkit-1/rules.d directory.
https://forums.freebsd.org/threads/xfce4-power-manager-plugin-not-working-as-expected.67780/
NOTE: To use this configuration, your user account have to be in operator group. I did this during installation as mentioned earlier.
// pkg info -D xfce4-session
//
// xfce4-session-4.12.1_6:
// Always:
// To be able to shutdown or reboot your system, you'll have to add .rules
// files in /usr/local/etc/polkit-1/rules.d directory. Which looks
// like this (replace PUTYOURGROUPHERE by your group):

polkit.addRule(function (action, subject) {
  if ((action.id == "org.freedesktop.consolekit.system.restart" ||
      action.id == "org.freedesktop.consolekit.system.stop")
      && subject.isInGroup("operator")) {
    return polkit.Result.YES;
  }
});

// For those who have working suspend/resume:

polkit.addRule(function (action, subject) {
  if (action.id == "org.freedesktop.consolekit.system.suspend"
      && subject.isInGroup("operator")) {
    return polkit.Result.YES;
  }
});

// Explicitly disallow hibernation because it's not supported by the OS.

polkit.addRule(function (action, subject) {
  if (action.id == "org.freedesktop.consolekit.system.hibernate") {
    return polkit.Result.NO;
  }
});
Now suspend/resume seems to work more reliably by command, lid close/open or from Logout dialog!
Screen Brightness
- XFCE4 Power Manager’s Brightness Control sometimes shows weird behavior. When I switch the power between AC and battery, screen brightness initially changes as configured but gets back to the previous level when I move mouse cursor.
After struggling for a while, I found the following configurations with the XFCE4’s brightness adjustment disabled allow me to automatically adjust brightness upon change of the power source (AC or battery).
[/boot/loader.conf]
[/etc/sysctl.conf]acpi_video_load="YES"hw.acpi.video.lcd0.economy=30 hw.acpi.video.lcd0.fullpower=60
Beep on Logout
- When unmute, opening the logout dialog makes a loud beep. I added the following line to ~/.xinitrc to avoid it.
xset -b
EPSON Ink-Jet Printer EP-802A
-
Install and configure CUPS as follows. Then point your web browser to localhost:631 and configure the printer.
sudo pkg install gutenprint sudo sysrc cupsd_enable=YES sudo service cupsd start -
xfce4-print package doesn’t seem to support CUPS (only supports LPD).
Audacity
- To export MP3, install lame from ports.
Audacity itself can be installed via binary package.
Joplin
- See this article.
OneDrive
https://github.com/abraunegg/onedrive
- On the previous main PC (Windows 10), I used OneDrive to import photos taken and uploaded by smartphones.
OneDrive Free Client allows me to achieve this on FreeBSD machine.
sudo pkg install onedrive

onedrive
# Open the URL shown and sign in with your Microsoft account.
# When you see a blank page after granting access to "OneDrive Free Client", enter the blank page's URL on the command-line prompt.

# Test it now.
# ~/OneDrive is the default sync_dir.
onedrive --download-only --dry-run --synchronize

# Real Run.
onedrive --download-only --synchronize
WINE
https://wiki.winehq.org/FreeBSD
https://wiki.freebsd.org/i386-Wine
https://forums.freebsd.org/threads/wine-wow64-and-winetricks-at-x64-wine.62634/
-
Install i386-wine-* (this time I chose ‘devel’).
sudo pkg install i386-wine-devel wine-gecko-devel wine-mono-devel winetricks -
I can run IrfanView, Picasa3 and Yamaha’s Mid Radio Player.
Bhyve
Maybe in another post.
Failover between Ethernet and WiFi
With the advice on FreeBSD Forum and Twitter, I finally got “lagg failover between Ethernet and Wireless interfaces” working as in the FreeBSD Handbook.
- FreeBSD Handbook: 31.7 Link Aggregation and Failover
https://www.freebsd.org/doc/handbook/network-aggregation.html
(Example 31.3. Failover Mode Between Ethernet and Wireless Interfaces).
My configuration (in /etc/rc.conf) is as follows.
ifconfig_em0="ether <WiFi MAC Address> up"
wlans_iwm0="wlan0"
ifconfig_wlan0="WPA up"
create_args_wlan0="country JP"
cloned_interfaces="lagg0"
ifconfig_lagg0="up laggproto failover laggport em0 laggport wlan0 DHCP"
As opposed to the handbook’s example, I use the WiFi MAC address on the Ethernet interface. Other than that, it’s essentially the same as the handbook.
(I’ve also tried “Ethernet MAC on WiFi” and it worked)
But at first I ran into a problem here.
When I reboot my system with the above configuration, lagg0 has only Ethernet (em0) as its member port. WiFi interface was not in the lagg0 because it seemed to be created after the lagg was initially configured. By manually running “service netif restart”, the lagg failover begins to work but I wondered how to avoid this manual intervention.
A discussion on the forum quickly solved the problem.
- FreeBSD Forum: lagg not working on cold boot
https://forums.freebsd.org/threads/lagg-not-working-on-cold-boot.71992/
It suggests loading WiFi-related kernel modueles by loader instead of devd.
I achieved this by adding the following lines to /boot/loader.conf and reboot.
if_iwm_load="YES"
iwm8265fw_load="YES"
This made iwm0 detected much earlier and lagg0 was successfully configured with both em0 and wlan0 as its members on boot.
Then I got another suggestion on Twitter that it’s better to load modules which are not required for boot from rc not loader.
I moved them from /boot/loader.conf to /etc/rc.conf and confirmed that it also worked as expected.
kld_list="/boot/modules/i915kms.ko if_iwm iwm8265fw"
(As I previously mentioned, i915kms.ko is for graphics.)
Burning CDs
I hadn’t burnt CDs for a long time but recently I was asked to create an audio CD. So I plugged in a USB CD-R/RW drive to my laptop and tried it on FreeBSD.
I found my system already had GUI-based Xfburn and Brasero in addition to cdrecord, a good old command-line burner program.
At first I tried GUI-based ones but both said ‘No burner found’. Because I was in a hurry at the time, I used cdrecord (as root) for the first time in 15 years.
-
Check the CD drive’s device number.
sudo cdrecord -scanbus ... 1,0,0 100) 'BUFFALO ' 'Optical Drive ' '2.00' Removable CD-ROM ... -
Burn it.
sudo cdrecord -v dev=1,0,0 -pad -dao music.wav
Because running cdrecord with root privilege could burn CDs, it was obvious that device permissions kept the GUI burners run by a normal user from finding the burner.
cd0 had the following owner/mode. As my user account (a normal user) was in operator group, I could read from the device but couldn’t write to it.
crw-r----- 1 root operator 0x7f Nov 9 10:16 cd0
I adjusted the device permissions with devfs.
-
Add the following a devfs ruleset in /etc/devfs.rules.
I added pass and xpt because adding only cd0 didn’t work.[devfsrules_cdwriter=20] add path cd0 group operator mode 0660 add path pass1 group operator mode 0660 add path xpt0 group operator mode 0660Maybe ‘cd0’, ‘pass1’ and ‘xpt0’ could be ‘cd*’, ‘pass*’ and ‘xpt*’.
But for now I use the formers with the following output.camcontrol devlist <Samsung SSD 860 EVO 1TB RVT02B6Q> at scbus0 target 0 lun 0 (ada0,pass0) <BUFFALO Optical Drive 2.00> at scbus1 target 0 lun 0 (pass1,cd0) <Generic- SD/MMC 1.00> at scbus2 target 0 lun 0 (da0,pass2) -
Add a line to /etc/rc.conf to use the devfs ruleset.
devfs_system_ruleset="devfsrules_cdwriter" -
Reboot the system.
-
Now I can burn CDs with GUI programs too.
Webcam and Video Conferencing
(Added on 2020-05-24)
It was a pleasant surprise to find that jitsi video conference using Firefox/Chromium just works with the help of cuse.ko and webcamd!
-
Install webcamd.
sudo pkg install webcamd -
Add a user to the webcamd group.
sudo pw groupmod webcamd -m genneko -
Configure the cuse kernel module to be loaded on boot.
sudo sysrc kld_list+=cuse -
Configure the webcamd to be started on boot.
sudo sysrc webcamd_enable=YESor
sudo service webcamd enable -
Manually load the module and restart devd to start the service, or reboot the entire system.
sudo kldload cuse
sudo service devd restart
or
sudo shutdown -r now
References
-
FreeBSD wiki: Laptops running FreeBSD
https://wiki.freebsd.org/Laptops -
FreeBSD wiki: Thinkpad T480
https://wiki.freebsd.org/Laptops/Thinkpad_T480 -
Running FreeBSD on the Lenovo T470s ThinkPad
https://blog.grem.de/pages/t470s.html -
FreeBSD on a Laptop (12-Current on T530)
https://www.c0ffee.net/blog/freebsd-on-a-laptop/ -
The Power to Serve – FreeBSD Power Management
https://vermaden.wordpress.com/2018/11/28/the-power-to-serve-freebsd-power-management/ -
FreeBSD Desktop
https://vermaden.wordpress.com/freebsd-desktop/ -
Getting Started With drm-kmod
https://freebsddesktop.github.io/2018/12/08/drm-kmod-primer.html -
FreeBSD wiki: Suspend/Resume
https://wiki.freebsd.org/SuspendResume -
FreeBSD Handbook: Wireless Networking
https://www.freebsd.org/doc/handbook/network-wireless.html -
FreeBSD Wireless Quickstart
http://srobb.net/fbsdquickwireless.html -
FreeBSD wiki: Synaptics Touchpad
https://wiki.freebsd.org/SynapticsTouchpad -
FreeBSD Forum & Bugzilla: Two-finger Scroll
https://forums.freebsd.org/threads/touchpad-envy.58739/
https://bugs.freebsd.org/bugzilla/show_bug.cgi?id=228875
https://forums.freebsd.org/threads/synaptics-two-finger-scroll.53720/ -
FreeBSD: Disable Your Lenovo Trackpad
https://ben-rowan.github.io/post/disable_lenovo_trackpad/ -
FreeBSD Forum: How to disable mousepad tapping ?
https://forums.freebsd.org/threads/how-to-disable-mousepad-tapping.17370/
Revision History
- 2019-08-22: Created
- 2019-08-27: Added “Failover between Ethernet and WiFi”
- 2019-09-15: Added “Suspend/Resume”
- 2019-09-22: Updated the OneDrive Free Client’s URL
- 2019-11-09: Added “Burning CDs”
- 2020-05-24: Added “Webcam and Video Conferencing”